 0
0 Pilates for knee injuries
Tue,Oct 07, 2014 at 02:32PM by Carla Mullins
Knee Injuries and Rehabilitation through Pilates: How pilates can help recovery for anterior cruciate ligament and posterior cruciate ligament injuries
The knee is a quite complex joint that takes a great deal of wear and tear, particularly for people with poor hip or ankle biomechanics. Unfortunately the knee is the hinge that often gets adversely affected, so then we need to address the symptoms of knee pain while also dealing with the underlying causes through gait correction.
Needless to say, knee injuries are a common problem presented to pilates practitioners. Ligament tears and repairs such as anterior cruciate ligament (ACL) and posterior cruciate ligament (PCL) are particularly common, as are knee replacements. Note that the likelihood of a knee replacement is increased if a person has had a previous ACL or PCL tear. A pilates studio can provide a great environment for successful recovery from such injuries.
The ACL and PCL both have an important role in maintaining tibial stability in relation to knee bend and straightening. These two ligaments sit as a ‘screw home’ mechanism between the femur and tibia. When there is damage in either of these ligaments the screw home mechanism of the tibia and femur are compromised. The tibia can translate too far forwards in the case of an ACL problem and too far backwards in the case of a PCL problem. In other words, tibial translation can reduce stability in standing and clients can complain that their leg is giving away from underneath them.
ACL and PCL reconstructions are usually required when there is a grade two or three level tear. The reconstructions generally involve the surgeon taking a part of the patella tendon or the semimembranosus (which is the longest of the hamstring muscles) in order to recreate the missing ligament. This means that not only do you have to be careful of the repaired ligament, but also the patella or hamstring. Care must be taken to protect the graft whilst at the same time building inner range quad strength and achieving optimal Range of Movement (ROM) through leg straightening. The aim in the first 6 weeks is to achieve 90-degrees flexion and 0-degrees extension of the knee joint.
It is of course important to start moving and building strength from day one of surgery. However, because of the repair and remodelling process of the ligaments, the graft is at its most vulnerable at six weeks post surgery. Accordingly, this is not the period of time to start adding load to the extensions of the leg, therefore you need to ensure that the chain remains closed (avoid legs in straps, or any open chain work) and the angle is not too extreme (care at the 90 degree angle on the Wunda chair).
During the initial repair and inflammatory phase, focus should be on placing the lower limbs in a position to ensure that:
// The tibia can hang down and be fixed at the ankle (in other words, use gravity to help the tibia/femoral movement) e.g. squats against the wall, or Reformer seated foot-bar exercises where the client is sitting on the foot-bar and pressing the carriage away from them.
// The tibia is able to slide anteriorly at the tibial talus joint when the knee is bending and the tibia can slide posteriorly at the ankle as the knee straightens.
// As the knee stabilises there needs to be an increased focus on strengthening the quads and hamstrings concentrically and ensuring that the stabilising gluteus muscles on the opposite leg are supporting the pelvis, e.g. exercises where the client is standing in the well and one foot is on the reformer headrest. The client is then pulling the carriage back to them.
Examples of appropriate exercises for the knee joint are detailed below. These are guidelines only and your imagination and understanding of the knee joint and the repair processes of ligaments and your particular client’s situations should be taken into account when determining appropriate exercises.
It’s also likely that there will be a variety of other body issues that you are going to have to deal with that will be incorporated into your program, thanks to tight neck and shoulders from the use of crutches, painful hips and sacroiliac joint from overloaded stabilization of the non-injured leg.
Phase 1: Day 1 to 7 weeks post-surgery
This is known as the destruction phase and inflammatory phase following ligament damage.
i. ROM: Knee extension with ball under the knee (immediately after surgery). Limit load on hamstrings as they attach to the tibia and can therefore impact on tibial stability. Do work on quad strength.
ii. Strength: Squats with a ball behind back, or just with back on the wall. Variation is to hold a bar in front.
iii. Traction: Thigh straps and ankle straps on the Trap Table. Have the heavy springs attached to the thigh and the ankle so as to support the joints, but allow some traction for the femur with the foot on the table to close the chain.
iv. Leg press on the Reformer seated on footbar from about 2 weeks after surgery onwards. Do not add load until after 7 weeks.
Phase 2: 7 weeks to 12 weeks post-surgery
This is known as the repair and remodelling phase following ligament damage.
i. ROM: Leg press on the Reformer seated on footbar, 1 red spring, progressively add more weight after about 7 weeks.
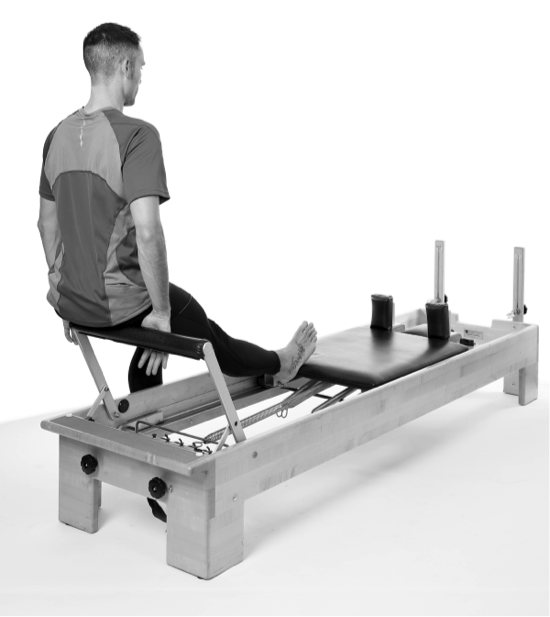
ii. Strength: Seated on the long box in the well end of the Reformer and have the feet on the head rest of the Reformer (1 blue or 1 red spring) and pull the Reformer carriage towards the person.
iii. Strength: Squats, preferably against the wall. Mid to inner range.
iv. Traction: Roll up Bar under the knees with the client facing the springs. The springs should give a nice traction to the joint and you can add a pelvic curl to this movement in order to facilitate the femoral traction. Progressively add higher level springs to increase the traction.
Phase 3: 12 weeks to 6 months post-surgery
This is known as the vascularisation stage following ligament damage.
i. Strength: Standing well pulls.
ii. ROM and strength:
a. Legs on the Reformer (keep the foot-bar low) for eccentric hamstrings.
b. Legs on the Wunda chair for isometric quad strength (step ups).
c. Standing leg pulls in the Reformer well.
To gain a deeper understanding images of these exercises are displayed below to provide examples of appropriate pilates exercises for knee rehabilitation.
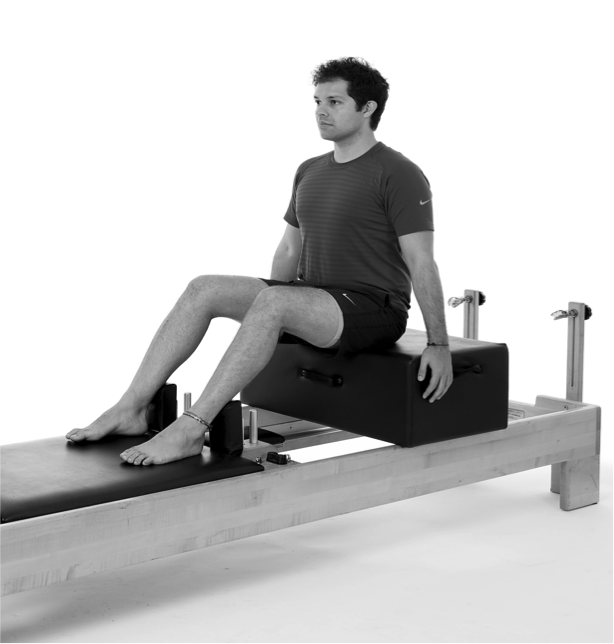
Phase 2 strength exercise seated using the feet to pull the Reformer carriage towards the body
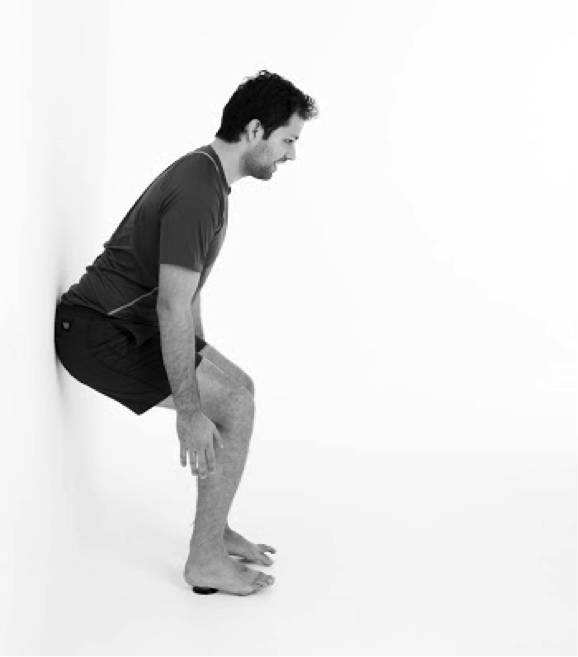
Phase 1 example of strength exercises
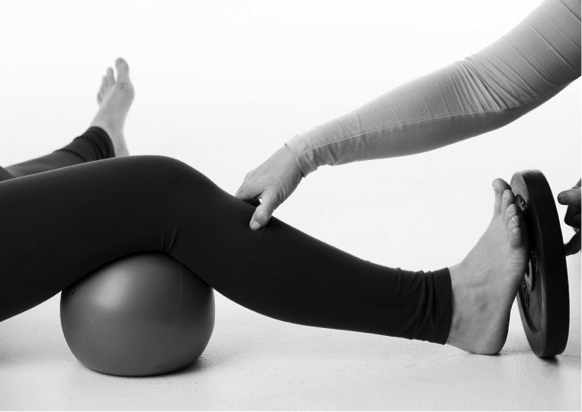
Phase 1 range of motion exercises with ball under the knee
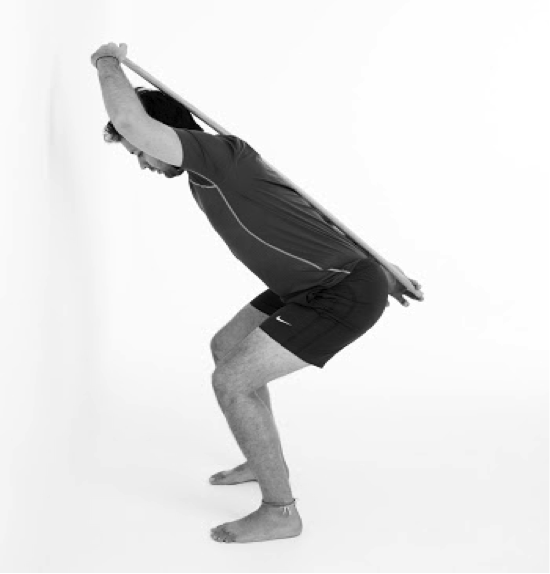
Phase 2 strength stage of exercise with squat, ensuring alignment as indicated by stick along the back
Phase 1 and Phase 2 range of motion exercises with leg press on the Reformer
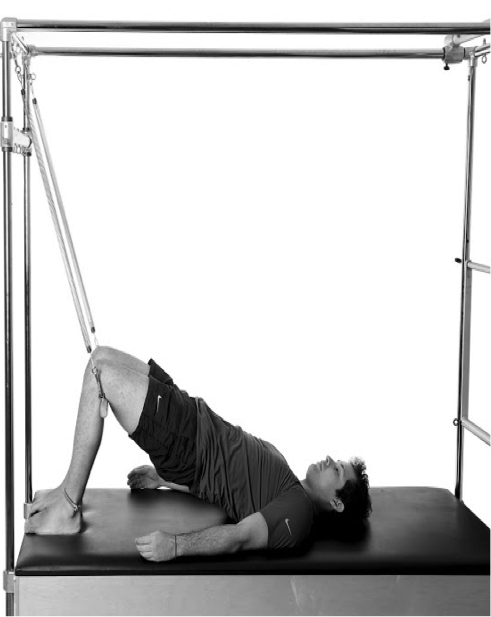
Phase 2 traction exercise with the Roll-up Bar under the knee
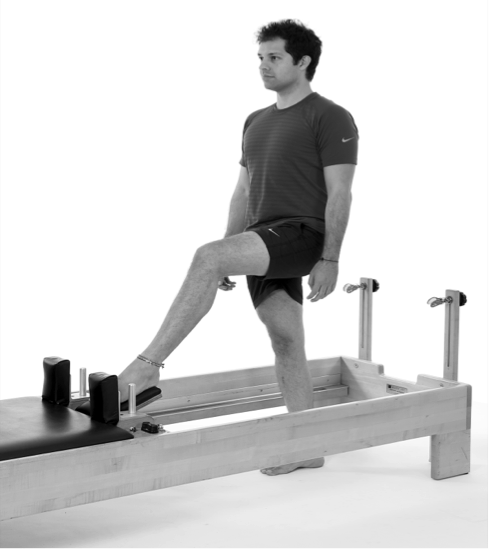
Phase 3 strength exercise standing in the well