 0
0 Arms and correct joint patterning in Pilates
Thu,Mar 02, 2017 at 12:22PM by Carla Mullins
Arms and correct joint patterning in Pilates:
Are we teaching how to optimise movement, or simply doing as we were told?
“The assumptions you don’t know you’re making will only get you into trouble and confusion”
Douglas Adams
It’s funny that you can be doing something for years, then injuries happen either in you or your clients, so then you have to re-look at something. It was my own adhesive capsulitis (a.k.a. “frozen shoulder”) and that same issue with several clients that made me stop and think about how the arms move and are we moving them properly in a movement class. Yes, I being in the business I had treatment for it all, but the process made me think about movement of the shoulder complex and what I do when I perform a whole variety of exercises, and was I really working in alignment and with optimal joint efficiency. At the risk of opening up a huge storm of protest, here goes: much of the traditional Pilates arm movements for exercises, including 100’s, could be varied to achieve a more optimal outcome for clients or tailored more specifically.
When I talk to Pilates practitioners, their comment is that 100’s is an exercise for breath, warming up the body, cardiovascular focus and abdominal muscles. Given that the terms of breath and heat are involved I automatically think about the 10th cranial nerve (vagus) having an impact. We have to think about how that nerve is affected by muscle tightness and interactions as well as joint placement, particularly the arms and neck. In other words, 100’s is not simply about moving the arms in a mad flurry; it is important to understand how the arms move and work.
What is important when we move the arm?
// Subacromial space;
// Scapula glide and slide on the rib cage and around the humeral head;
// Humeral head spiral in the gleno-humeral socket;
// Sternal glide and slide;
// Capsule stability, that is, we are not losing the humeral connection [congruency] to the socket by pressing into the stabilising capsule around it;
// Thoracic mobility and facet joint mobility, which is covered in this article on Thoracic and Diaphragmatic Mobility;
// Clavicular and coracoid placement particularly so that the nerves are not compressed.
Yes, all the muscles of the arm and shoulder girdle are important, but these muscles cannot respond correctly if we do not have the correct joint patterning and placement. Accordingly, in this article we want to explore joint rhythms and placements in specific movements that can help improve the functional muscular and breath patterning when we are working with the arms.
Let’s experience the rhythm of the upper body first
Stop a moment and start to lift your arms up into the air. There are many ways we can do this and I am going to take you through various steps. We are going to try this several ways and when you do this I want you to observe within your own body:
// What happens to your subacrominal space?
// What happens to your scapula?
// What happens to your sternum?
// What happens to your thoracic spine?
// What happens to your breath?
// What happens to your neck?
When we lift our arms to shoulder height (a 90 degree range) and then lift the arms half way, we create a 45 degree angle to the body from the shoulder. Try these different ways of lifting the arms:
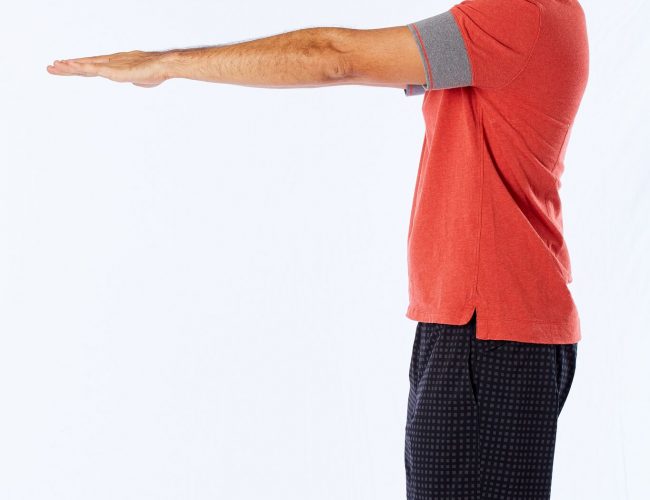
Option one: With the palms facing the floor the whole way
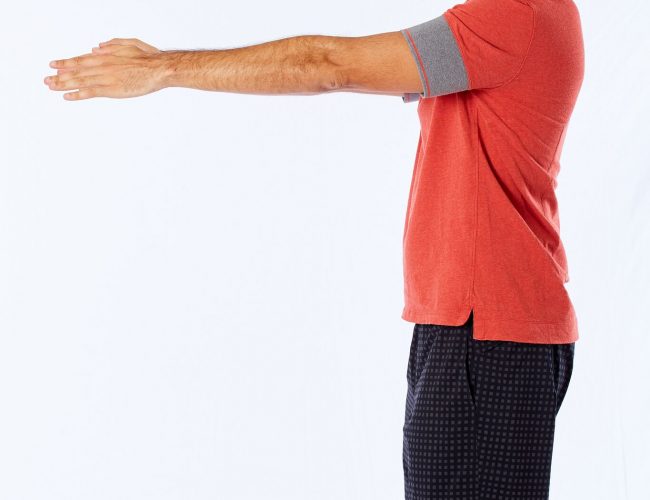
Option two: With the palms facing each other
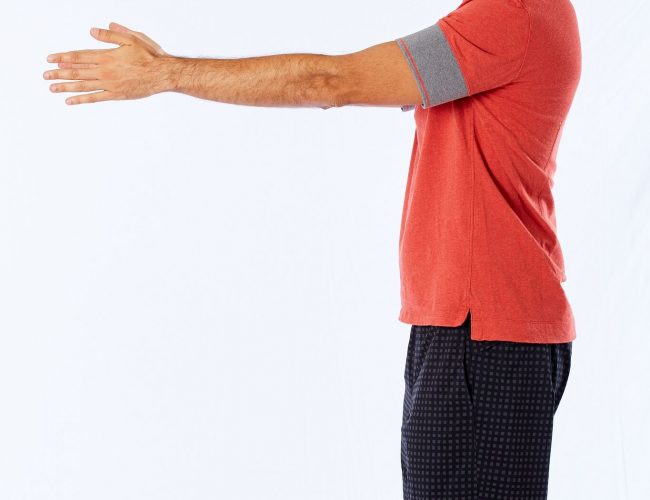
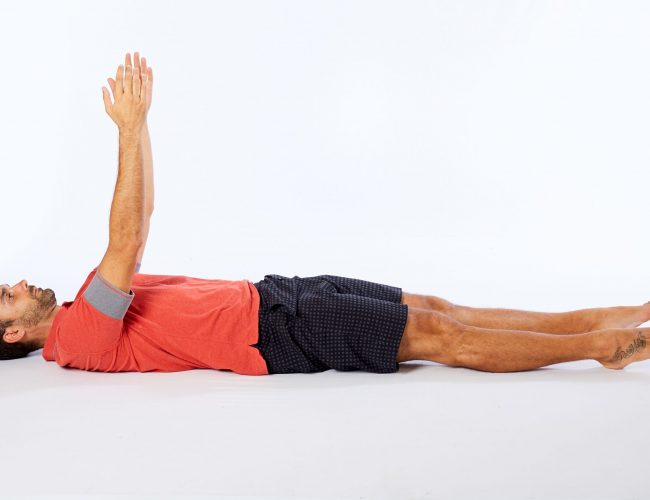
Option three: With your palms halfway between the two options above, that is thumbs up in the air and at an angle with your pinky finger lower (see photo).
Please remember not to judge any of these movements, rather simply experience and observe. It is interesting to note that option three probably results in easier lateral breath into the ribs and less tension in the neck and shoulder joint, as well as better scapula glide and humeral placement. This is because as the arm moves in this positioning of spiraling at the humeral joint, the serratus anterior is able to activate and not simply just the latissimus dorsi.
What is the difference in latissimus dorsi and the serratus anterior?
The latissimus dorsi is a large superficial muscle that connects from the posterior humeral head down the back with connection to the thoracolumbar fascia into the ipsilateral iliac crest. As such its role is important in stabilisation when walking as well as in spinal rotational work. Therefore it is an important part of the posterior oblique sling. Remember that when this muscle is very tight the shoulder may start to respond by pulling the scapula down, thereby reducing the subacromial space and pulling the coracoid process downwards and forward, pulling on the pectoralis muscles.
It is also important to remember that the latissimus dorsi does not have a role in breath and therefore cannot assist in the movement of the ribs, diaphragm etc. The over-engagement of the latissimus dorsi may therefore be a hindrance in exercises such as 100’s.
Serratus anterior on the other hand is a secondary or accessory breath muscle. Serratus anterior lifts the ribs (5-10) and pulls those five ribs backwards and outward so as to raise the ribs in a very large lateral movement. In other words facilitating the “bucket handle” inhalation, which is necessary for lateral breath stabilisation.
The pectoralis major is a secondary or accessory breath muscle that attaches to the clavicle, sternum and arm. When this muscle contracts the ribs are listed mostly through ribs 4-8. This movement contracts the sternum by closing the coastal angle of the ribs. Accordingly, any movement requiring the costal arch to narrow and the sternum to glide down is going to have an impact on how the humeral head is going to sit and how we breath and move. When we start to activate into the pectoralis major we start to activate into the secondary breath muscles rather than the diaphragm.
Pectoralis minor is also a secondary or accessory breath muscle. When this muscle contracts it draws the caracoid process forward and contracts the ribs forward into the clavicle. Once again resulting in the use of the secondary breath muscles, and the compression of the glenohumeral joint as well as the clavicle.
Given how all these muscles and joints play out when we move the arms, flex the spine (see our article on Spinal Flexion) then perhaps we should consider what happens when we do exercises like 100’s in the traditional manner and then with some slight modifications of the arms.
Pilates Hundred as I was taught in 1993 and as still taught now
It is not hard to find youtube videos on how to do 100’s. These are the steps that I typically see:
Step one: Lie supine with the arms going overhead so that the palms are facing the ceiling, but at the same time try and funnel the ribs down.
Step two: Bring the arms forward towards the hip as you lift your head and shoulder up from the floor legs go up in the air. As you bring the arms down you are encouraged to draw the shoulder blades down the back.
Step three: Once in position you start to breath inhale, exhale as you beat your arms a small amount with the palms facing the floor. The torso stays rigid with abdominals deeply contracted and you are somehow meant to breath laterally in this process.
In the link below is a video from Pilates Anytime where you can see the perfect 100’s as taught by Joseph Pilates and his disciples. Also there’s a link to a classic exercise card on the 100’s.
Pilates Hundred Explained and Demonstrated
Some suggestions for changes to the Pilates Hundred and why
Suggestion one
Start with the arms perpindicular to the body (see photo), palms facing inwards so that the humeral head can sit optimally in a slightly posterior position within the gleno humeral capsule. The spine can be in a resting position with optimal placement of the joints. If we take our arms overhead our thoracic spine should be in a slight extension so that our ribs, clavicle and sternum can allow the proper joint movements and the diaphragm to descend and hinder the flexion patterning of the spine.
Suggestion two
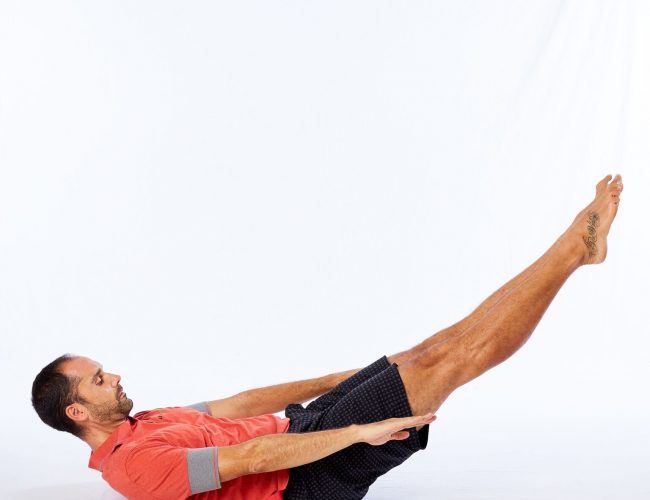
The sternum starts to glide down as the head moves down towards the mat (the tongue curled under and will be sitting at the back of the bottom teeth – this relates to the vagus nerve and hyoid bone placement an article in itself). The arms start to lower towards the thighs, spiralling as the thumb leads the movement. The humeral head will spiral slightly into an internal rotation or flexion type patterning. When the hands reach the thighs the arms should be spiralling slightly so that the thumbs are towards the floor and the palms are at a 45 degree angle to the thigh (see photo below).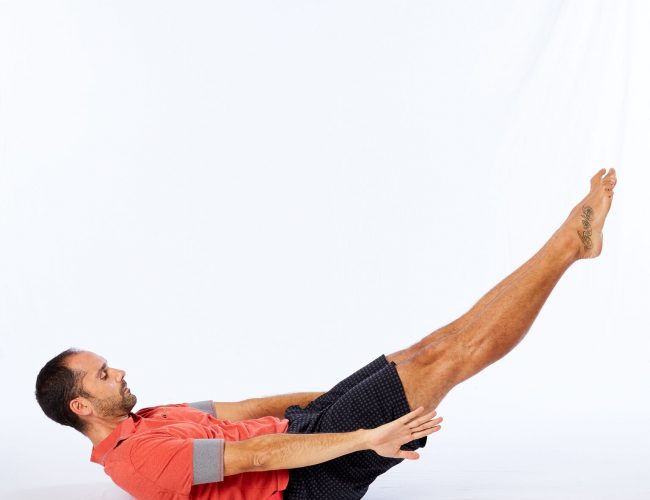
This positioning will allow for the scapula to protract, opening out the serratus anterior muscles to better facilitate lateral breath patterning on the exhale breath. When the person takes the exhale breath the sternum should slide down a little bit more and the torso comes into a deeper flexion.
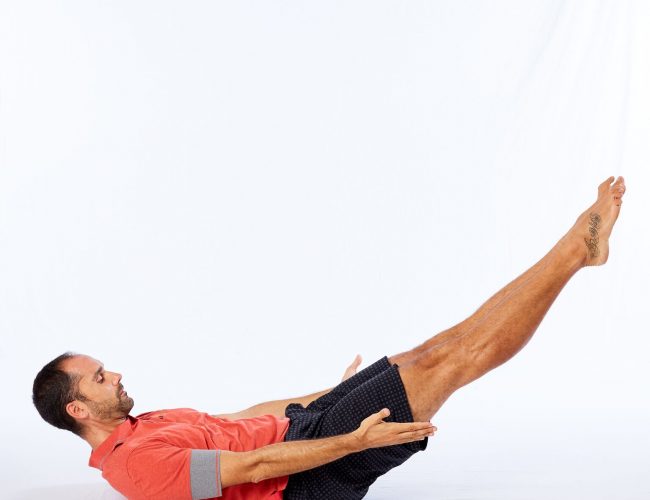
On the inhale allow the humeral head to spiral a little, leading with the pinky finger, so that the palms are facing towards the ceiling (see photo). This will facilitate the little movement of the ribs in the upper rib cage in the pivot positioning we know as pistons. This movement is necessary for the inhale patterning and should help facilitate the ascent of the diaphragm.
Conclusion
We hope that this article is seen as part of a broader consideration of how movement and arthrokinetics underpins the pilates method, Gyrotonic method and all the other methods of movement that now proliferate in the mindful movement market. As movement educators it is our role to consider the appropriateness of the movement on the body before us. For those of you interested in more we discuss these concepts and more at our Body Organics Anatomy dimensions courses that we operate in Australia, NZ, USA, Mexico,Peru, Chile and Spain.
Carla Mullins is co-director and co-owner of Body Organics, a multidisciplinary health and body movement practice with 3 studios in Brisbane. Carla is a Level 4 Professional Practitioner with the APMA and has also studied pilates with APMA, PITC as well as Polestar. She also has a LLB (QUT), M. Soc Sc & Policy (UNSW), Advanced Diploma of Pilates Movement Therapy (APMA), Diploma of Pilates Movement Therapy (APMA), Diploma Pilates Professional Practice (PITC), Gyrotonic Level 1, Gyrotonic JSB, Gyrotoner, CoreAlign Level 1, 2 and 3 and Certificate IV in Training and Assessment.